Rebranding: Making A Moodboard
/
I remember thinking over this past winter, “Oh man. Rebranding is so intense. My designer and I have to work together to figure out how to express who I am and what I do in ONE logo. Just one. Not only that, I’ll need to visually “brand” everything in my business cohesively, from my business cards, to my packaging, to my website…where do we even start??”
I’ll tell you, friends. It all starts with assembling a launch pad. In the case of branding and visual design, your launch pad is a moodboard!
After assessing why I needed to rebrand and who the new brand would be for (a.k.a. my Dream Clients—you guys!), it was time to begin thinking about how to express all that in a visual way.
While one of the core components of a company’s brand is their logo, it can be difficult to just whip up a logo out of thin air. When my designer, Sara, and I started working together, one of the first things she asked me to do was create a moodboard so that we could have a visual starting point to build the rest of the brand from.
I thought assembling a moodboard was so helpful because even though the new brand would be for me and my business, and it will reflect who I am, I found it difficult to know exactly what I wanted in the beginning of the rebranding process. Creating the moodboard helped me to get a clear visual idea of “Who am I as a photographer?” Even more important, it helped me hone down and get very specific, only including the most relevant and important visual themes.
Moodboards are very versatile and can be used to help you get a big picture view and build a visual foundation for so many different occasions. A friend of mine who is currently planning her August wedding just created a moodboard including images of bridesmaid dresses, the venue they chose, color swatches, florals, calligraphy, table settings, and more! When I saw her moodboard I immediately got a clear idea of what she wanted the mood and overall aesthetic of her big day to be like, and that’s a really exciting thing.
You can use moodboards in your life too, no matter your situation! Here are some quick ideas for when having a moodboard might be helpful:
- Updating your home decor or room colors
- Planning your engagement session, wedding, maternity session, senior photos, etc!
- Redesigning the look and feel of your blog
- Refreshing your workspace, whether in the office or at home
- Revamping your wardrobe
This is just a very short list in a whole world of possibilities! Since I found this process so exciting and helpful, I thought you might benefit from it too. So if you want to create a moodboard of your own, here’s how you can do it:
1) Get clear on what your situation is now, and what you want to be different about it. What feelings do you want your new wardrobe/workspace/blog/etc. to evoke in you, and in other people who see it?
In my case, I also needed to think about what themes are consistently true to me, and what will catch the attention of others who might be able to relate to me, or want to work with me. Sara also had me narrow down on some “key word” adjectives that described me and my work at a glance. Having those words to refer to helped a ton!
2) The end result of going through these steps is going to be a collage of different photos, so it’s time to start finding some! And what’s a better place than Pinterest? Believe me guys, Pinterest and I got to know each other reeeeeally well as I made my moodboard! Go get on Pinterest (create an account first if you don’t have one) and start observing what you’re most drawn to when you think about your answer from #1.
3) Begin pinning things to a new dedicated Pinterest board, which will later become your moodboard. Don’t rush this step, and take your time over multiple days! In the case of revamping your wardrobe, you might want to stick to looking for images of color and texture swatches, shoes, jewelry, accessories, and clothing items.
In my case, I was looking for a wide range of inspiration, from architecture, to home decor, to clothing, to plants, to typography, to printed pieces, to packaging, to artworks, to color and texture swatches. Whew. It was a lot but it helped me to expand my perspective and not limit what I thought my new brand could be!
4) After pinning like crazy, you’ll need to edit down. Revisit your thoughts from step #1 again, and then look back through your pinterest board to see what makes sense together, and what doesn’t fit quite right. Don’t be afraid to hit the delete button—less truly is more! Deleting is the only way you’ll be able to create a finished moodboard and a cohesive “launching pad.”
I deleted some things right after I finished pinning, but I found I had the best results after coming back to my pinterest board a day later and then repeating the process. With a fresh perspective, you can more easily pick out cohesive patterns, and what doesn’t belong.
5) After honing down to a final collection of images, you could keep the Pinterest board as your moodboard, or you could use a template from a free service like Canva. A separate template will eliminate all the distracting text below the photos you chose on Pinterest. In my case, I shared my Pinterest board with Sara and she created a finished moodboard for me (Thanks Sara!!)
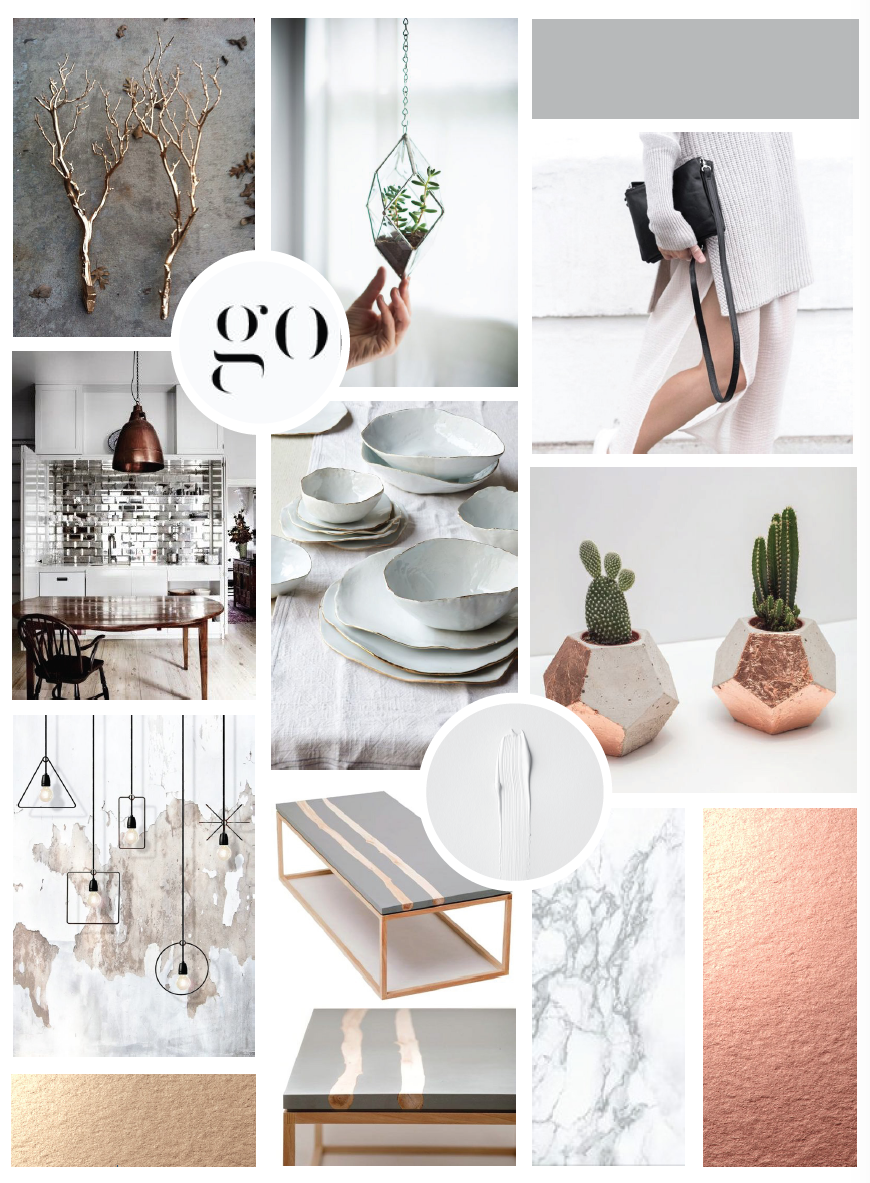
My New Moodboard
After pinning for hours and considering the essence of my new brand, I’m DYING to share my new moodboard with you!! Here are my brand key words for some context:
Organic | Vibrant | Genuine | Warm | Modern | Clean | Luxurious | Minimal

What do you think, does it reflect the key words I chose? What feelings does it inspire in you? The different themes in this moodboard are close to my heart and I can’t wait to share more about them in detail as I continue blogging! But to put it concisely, I think the two most important themes for me are:
- Less is more. Let’s focus on having fewer, but better, and more meaningful things that help us feel at home and at ease.
- There is beauty and great value in the details and imperfections of life.
That’s what my moodboard (and shiny new “launching pad!”) makes me think of, and I think it’s the perfect way to begin forming my new brand! I can’t wait to hear what you think!
I’m dying to know: have you ever made a moodboard of your own? If so, please share! If you’ve never made one before, do you think it would be helpful in tackling different visual projects?
This week, don't forget to follow along on Instagram as I continue telling my rebranding story and what it means for you!